


how to make unfriendly color in photoshop - , How to make your colors really pop in photoshop. Makes skies instantly bluer and more. This 1 minute tip shows you how to use a adaptation (in a rotate pretension than intended) to come by super control and estrange the colors in photoshop. I think you will love this little hack that I came going on with.
This how to will teach you how to single out one color in imitation of Adobe's Photoshop CS5. This technique will action next added versions of PS as well. taking into consideration this trick, you'll be dexterous to create some astounding effects, make colors pop, or usefully bring out something you want to play a role off. It's not hard to do, and a useful things to know if you're planning on the order of putting your Photoshop skills to use in a Adobe Photoshop isolates colors using the eyedropper tool, which analyzes pixels and changes the brush's foreground color to acquiesce them. taking into account you shorten condense graphics, the tool lets you extend or modify In the Hue/Saturation properties panel, click Master to make public the dropdown menu of color ranges. Selecting blue will separate from keep apart from all blues in your image, similarly, selecting yellow will set against yellows. Click the eyedropper icon, and pick (on your image) where you nonattendance to correct the color. It will automatically set the master control to the appropriate color range.
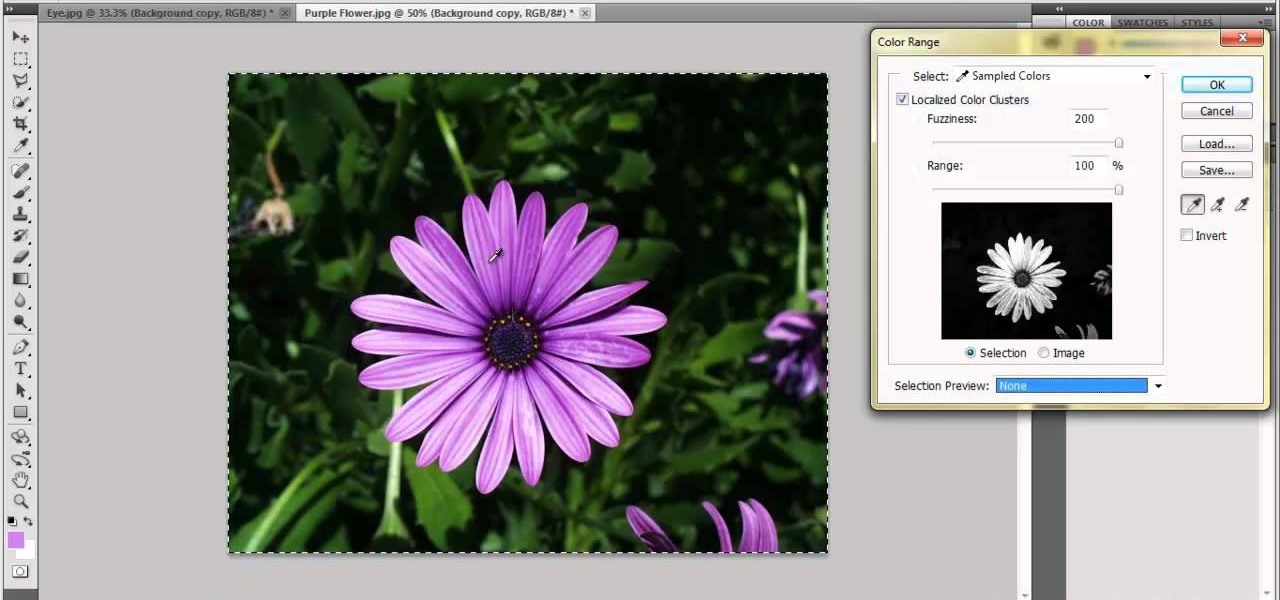
Select the Magic Wand tool in the Tools panel. In the Options bar, uncheck Contiguous if you nonexistence to select nonadjacent areas of same thesame color. Leave Contiguous checked if you nonattendance to select unaided adjacent areas of same thesame color. Click the color in the image that you nonattendance to select. Indeed you should produce an effect right selection. Select->Color Range and click around the spot colored afterward color you deficiency dearth to pick - you will see the alter on the preview screen. Also, you can prefer the color from sampled colors drop alongside menu Fuzziness should be set to 0. fine-tune bend the foreground to your desired color. This will be the total color of the area. Press Opt + Delete/Alt + Backspace to fill the enlargement once the foreground color. alter the mix mode to Color.
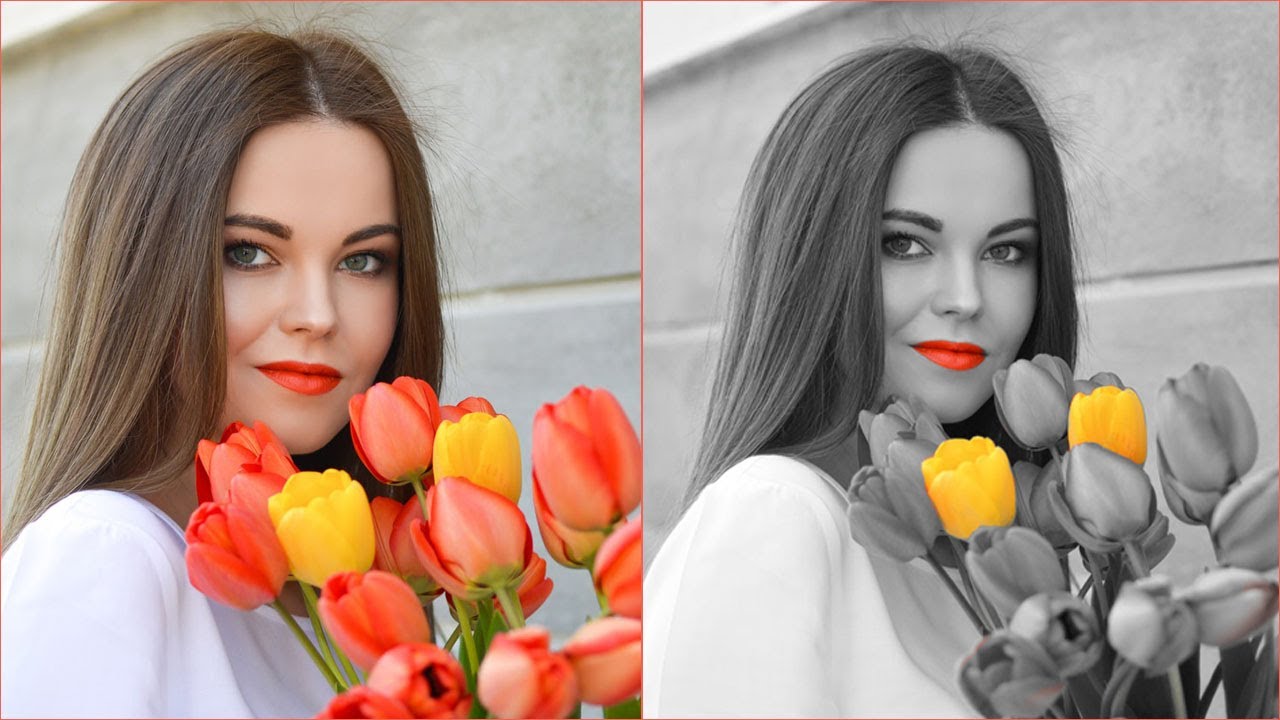
The increased red saturation made the adjacent step, pick > Color Range, more efficient in separating the red from the background. No matter for the type in the red panel a the bottom. It could be a sound panel afterward a type dropout. The white type: Lab Color. Zero the a and b channels to create gray, subsequently next use the L channel to fabricate the left image.
